The yakʔitʸutʸu Office 365 Add-In was created to simplify the process of accurately representing buildings in our newest residential community. The following resources include steps to get started.
Features
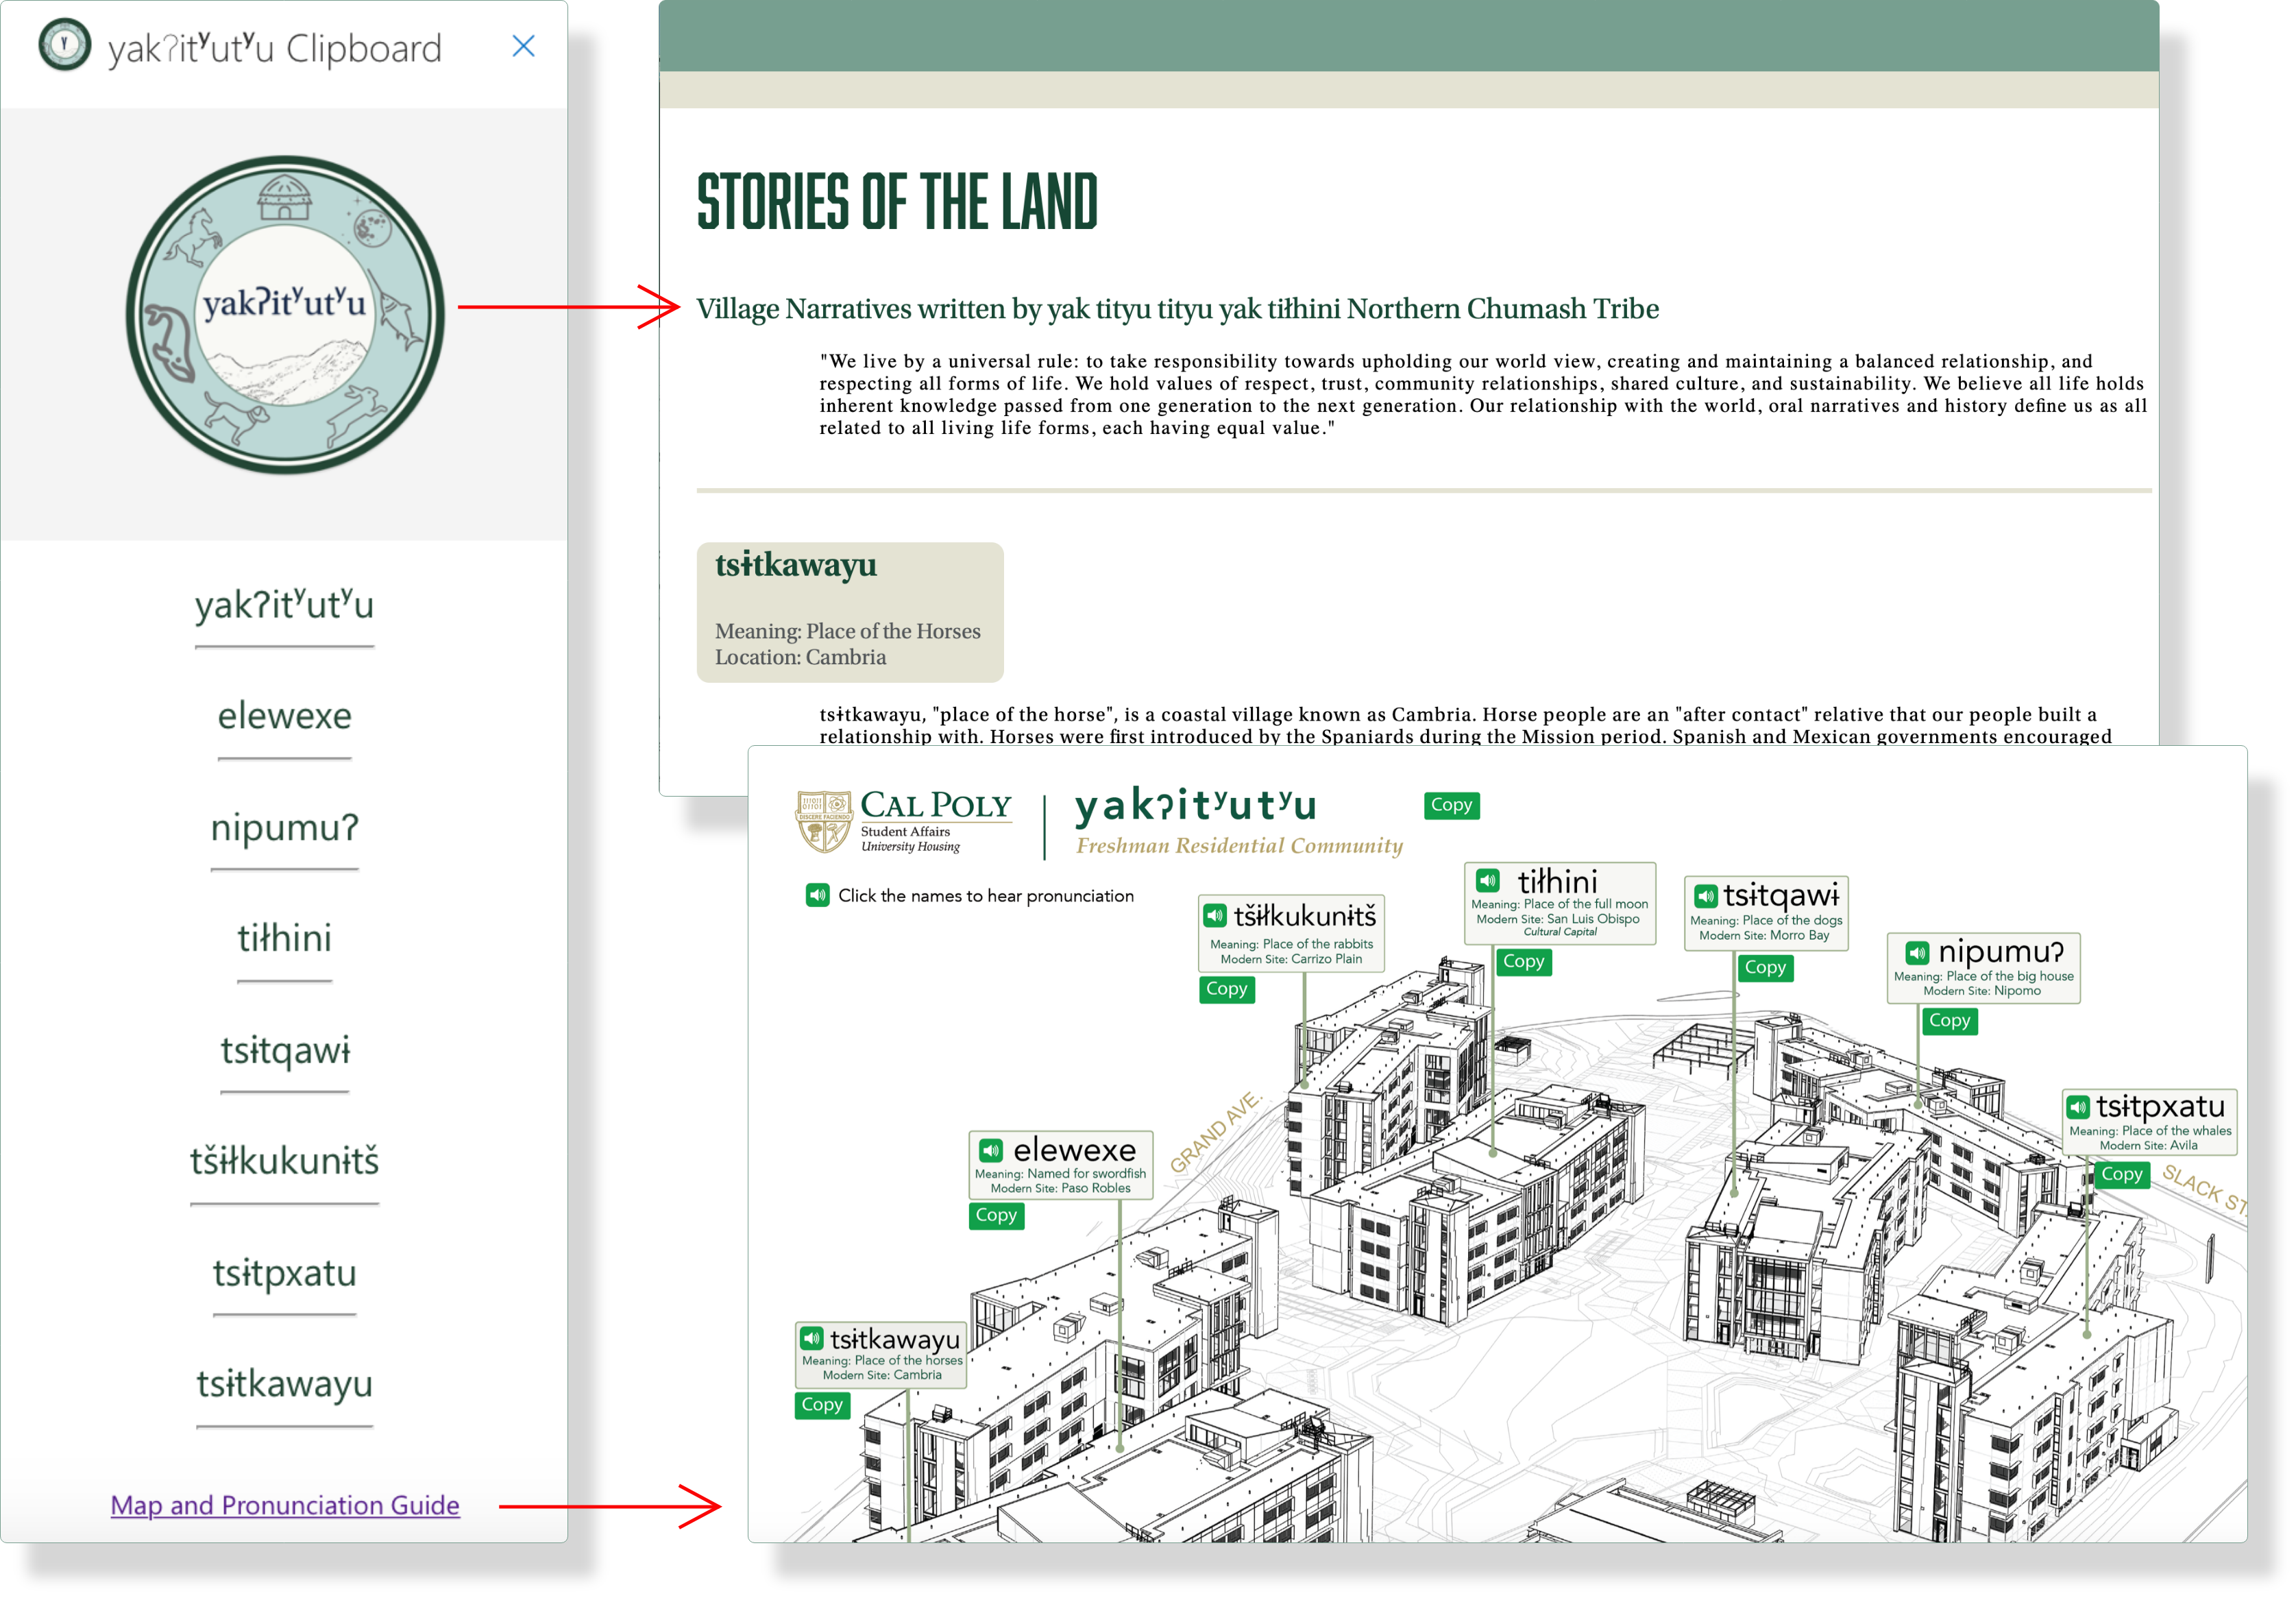
This add-in allows you to quickly and accurately insert building names, including their special symbols, into written documents in Outlook and Word. The add-in features a building map and audio pronunciations of each building name. It also incorporates learning resources to highlight stories of the land. These stories provide historical context related to the Northern Chumash tribal locations from which the residential community is named.
Setup Guide
|
|

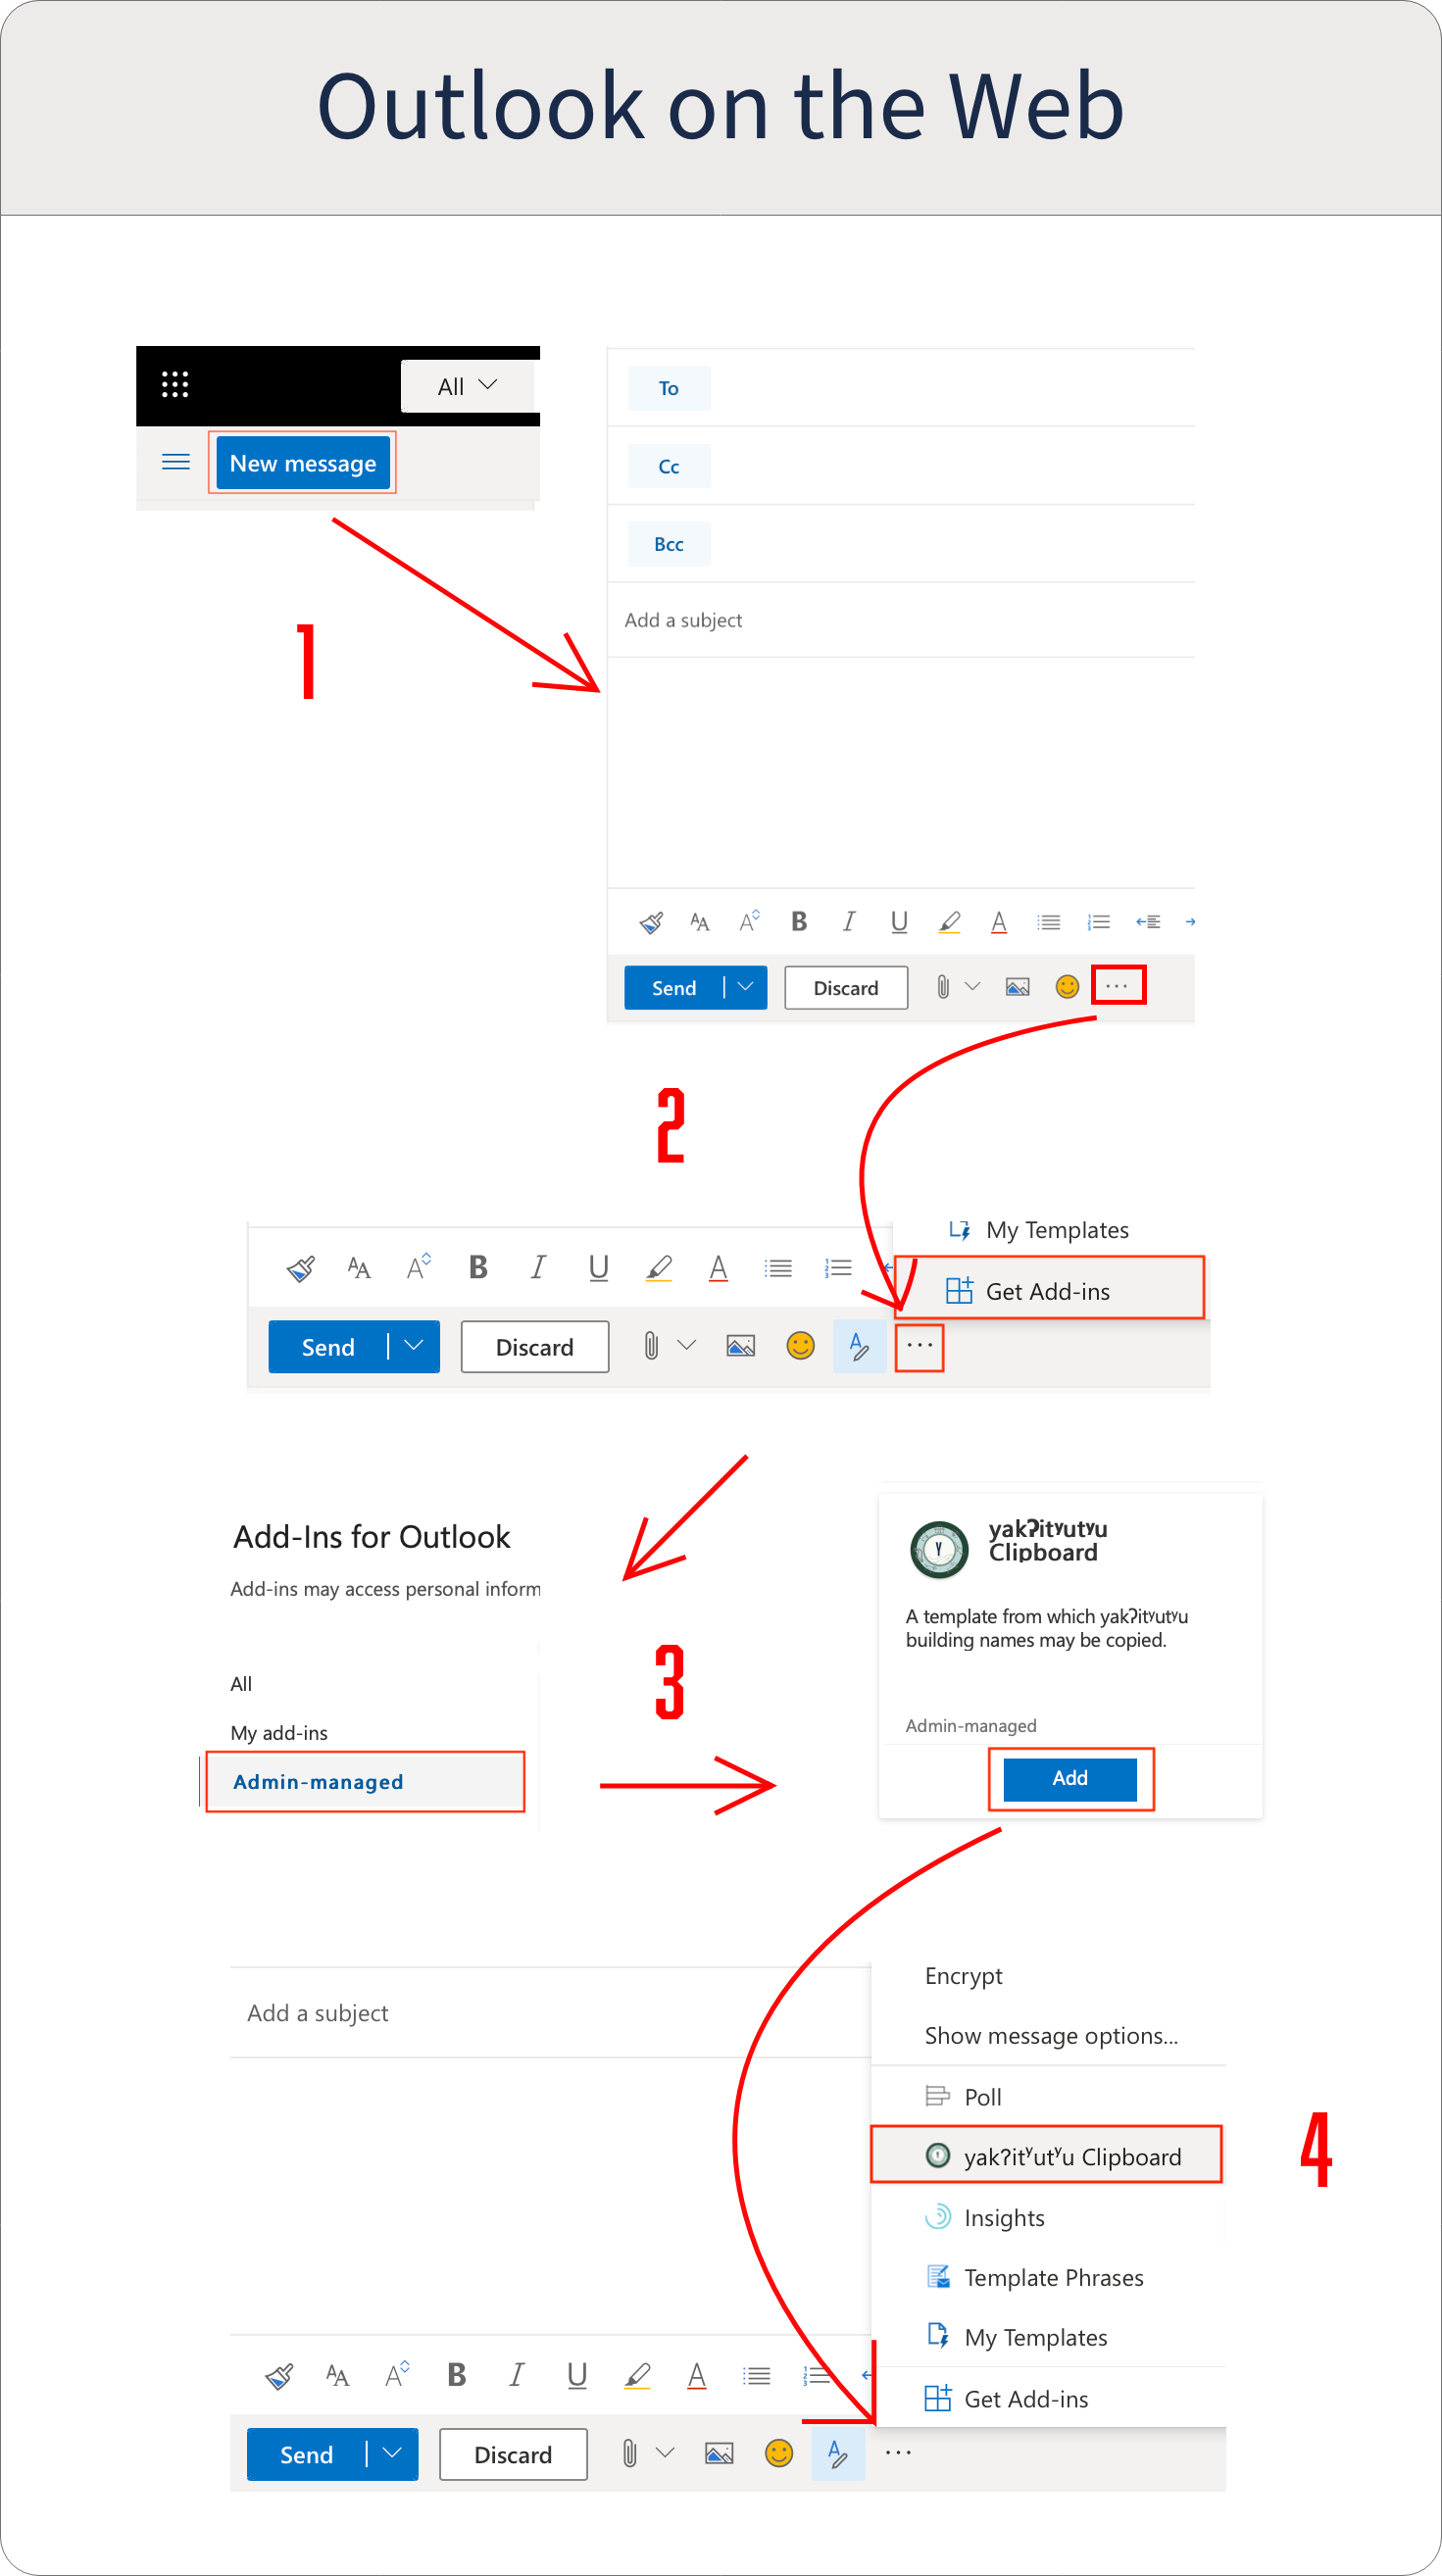
- Create a new message.
- Locate message utility toolbar.
- Activate add-in via "Admin-Managed" add-in menu.
-
Selecting the "Get Add-In" option, will display a new window with available add-ins.
-
Search in the "Admin-Managed" section for "yakʔitʸutʸu clipboard"
- Open and use add-in.
-
Return to the message utility toolbar, and select the three dot (...) option.
-
The activated add-in should appear in this list.
Back to Top
|
 |
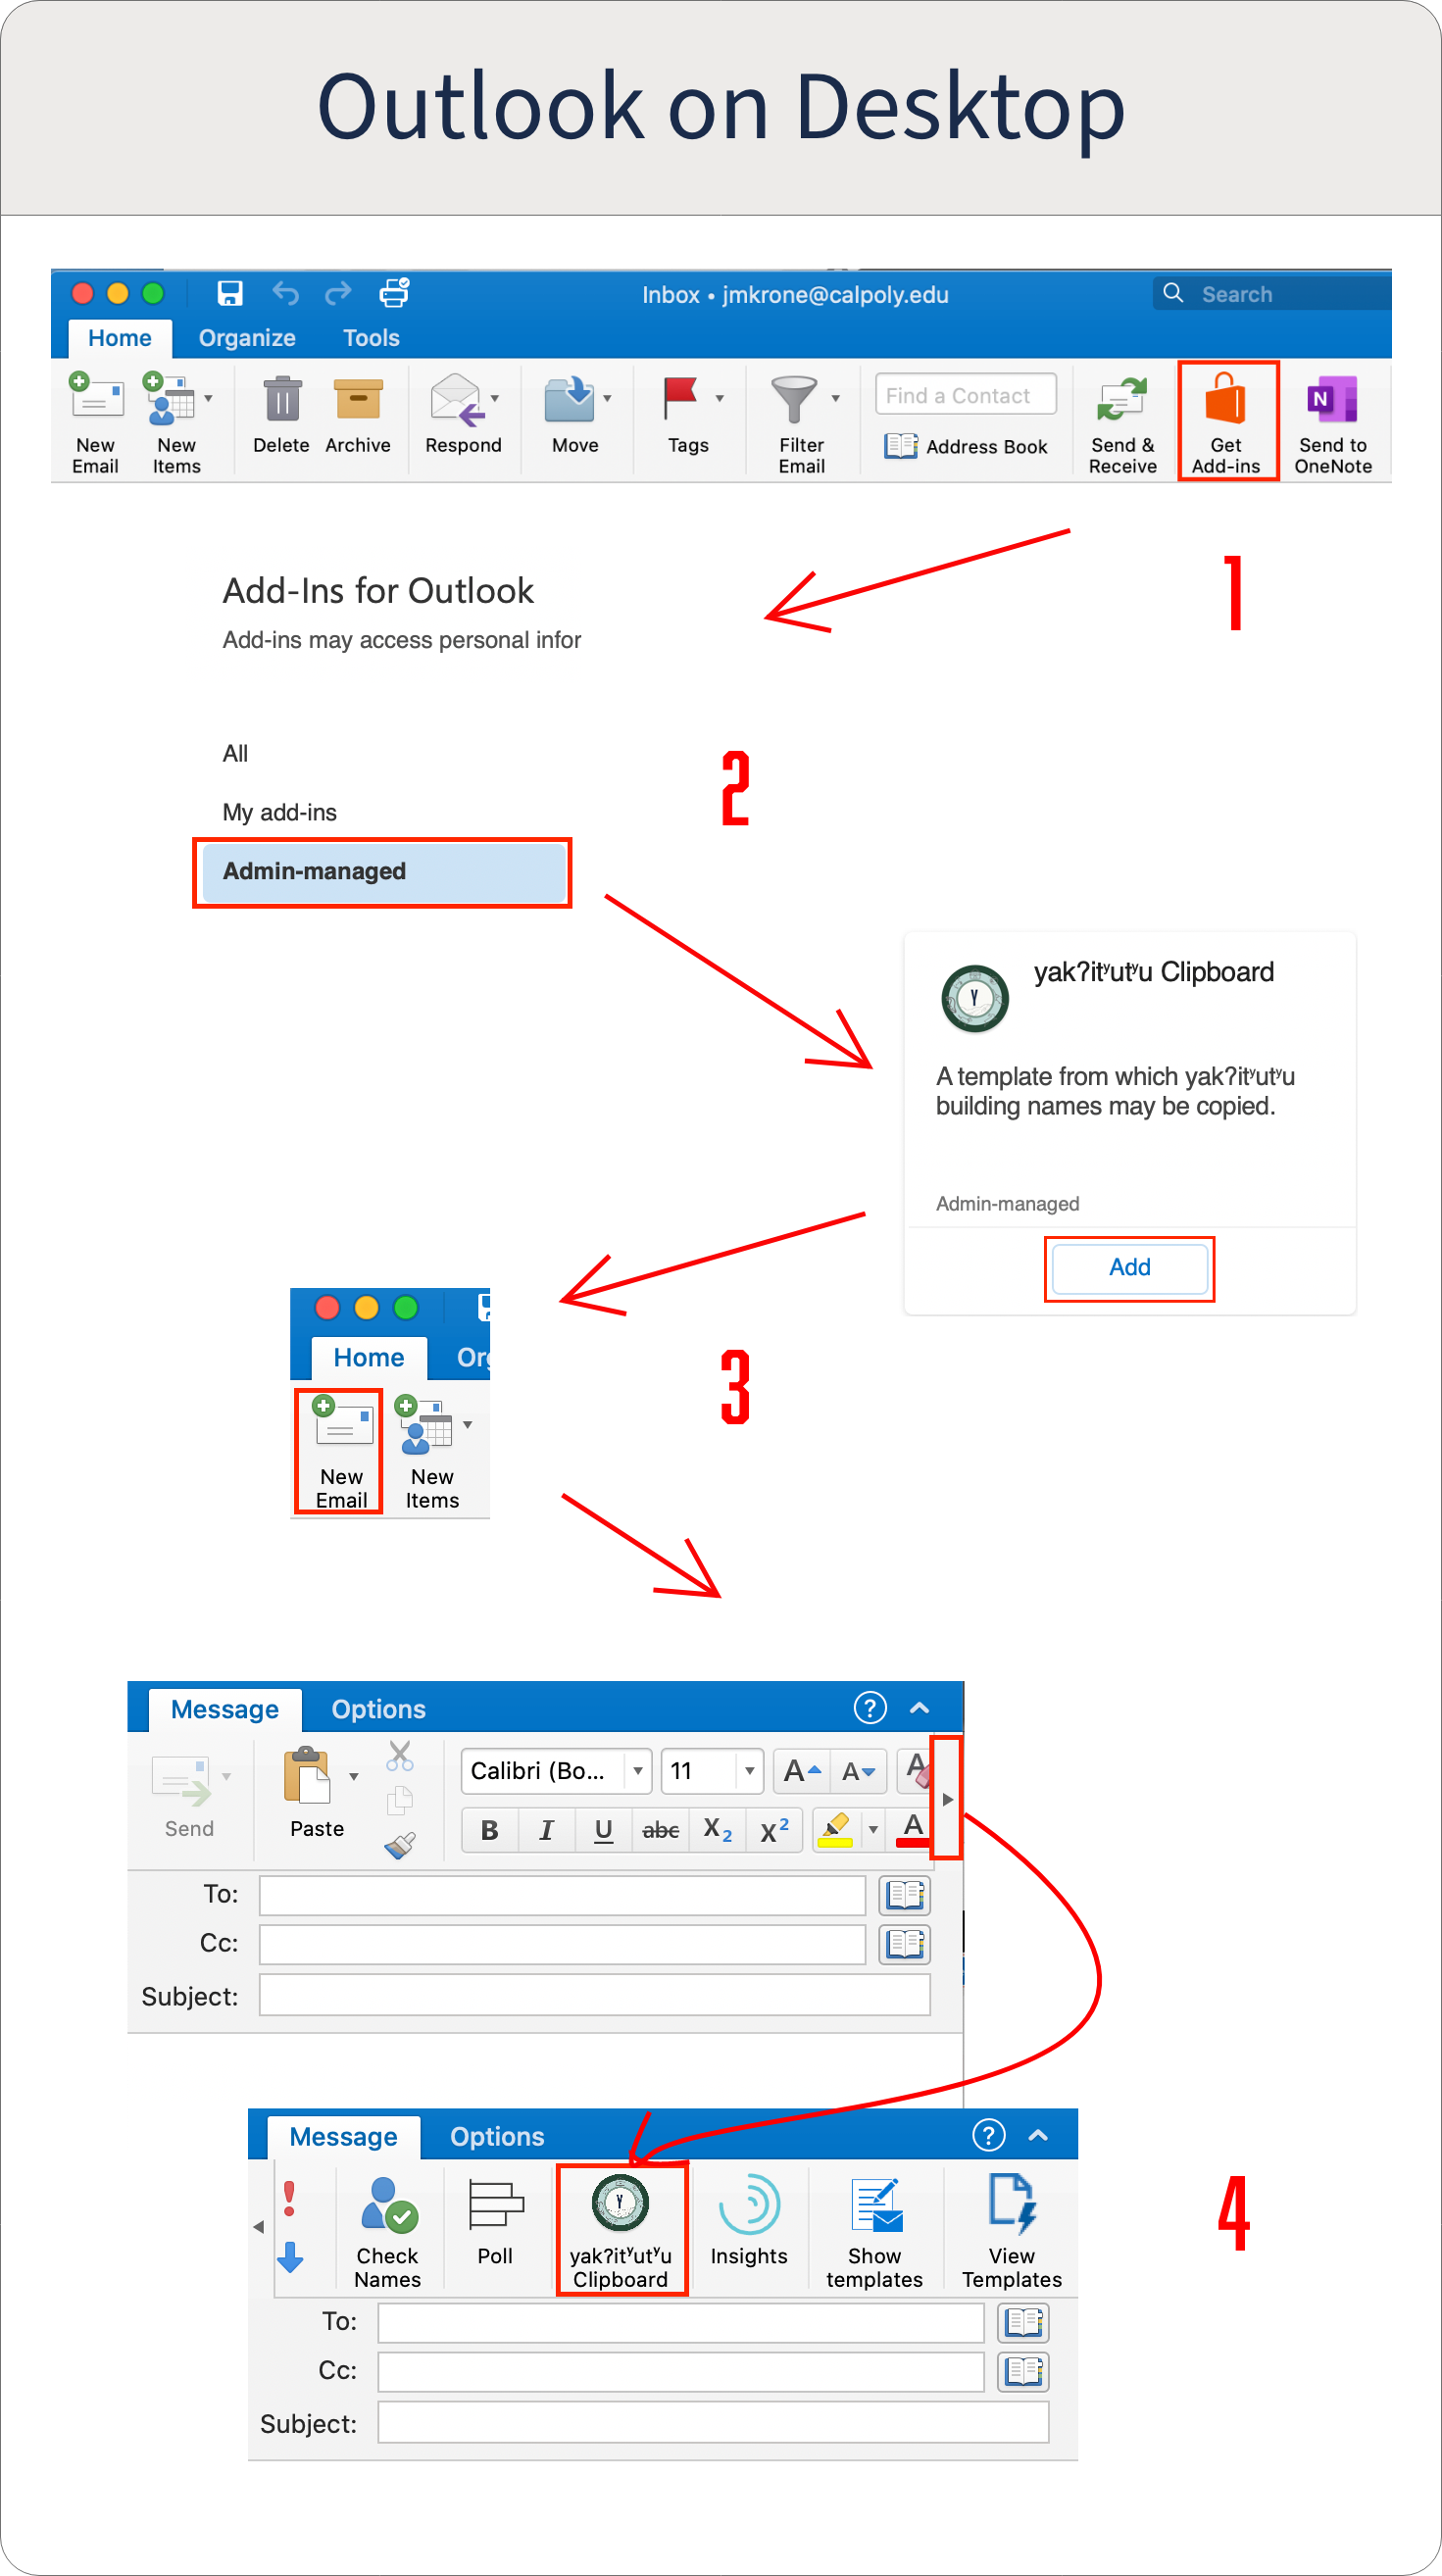
- Locate "Get Add-ins" button in the "Home" tab toolbar.
- Activate add-in via "Admin-Managed" add-in menu.
-
Selecting the "Get Add-In" option, will display a new window with available add-ins.
-
Search in the "Admin-Managed" section for "yakʔitʸutʸu clipboard"
- Create a new message.
- Open and use add-in.
Back to Top
*Compatible with Outlook Version 16.41 and higher
|
 |
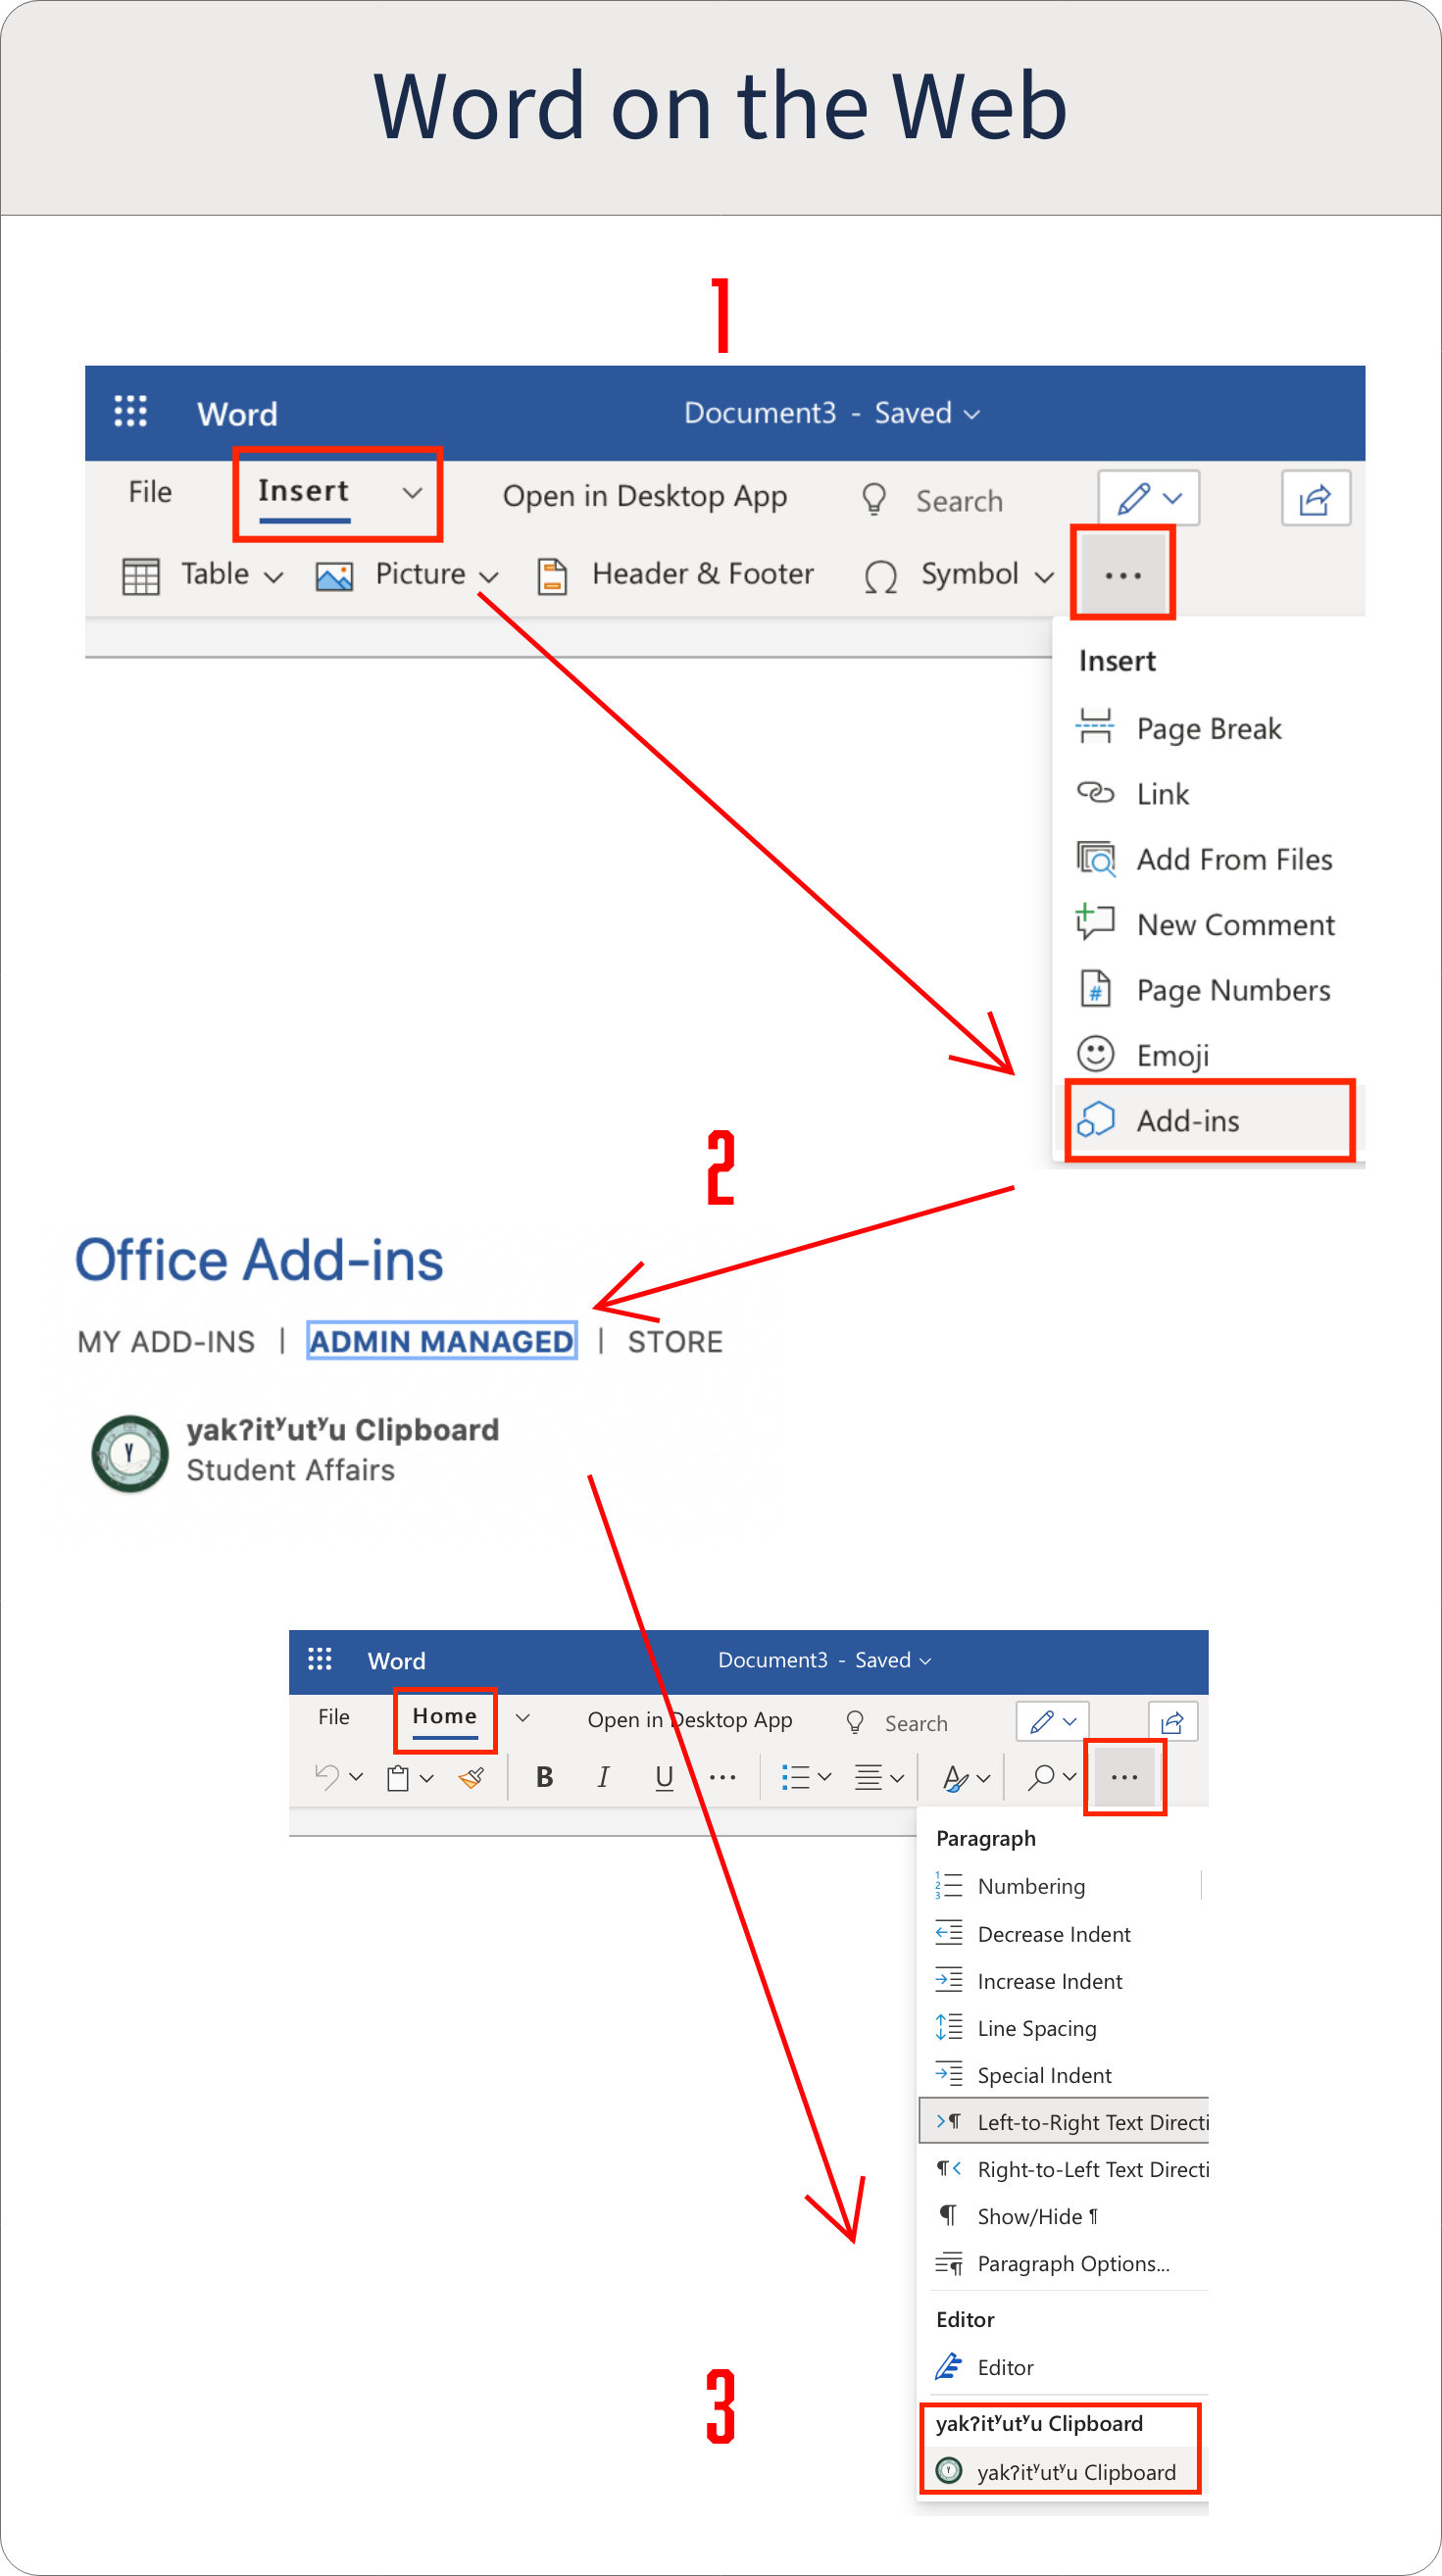
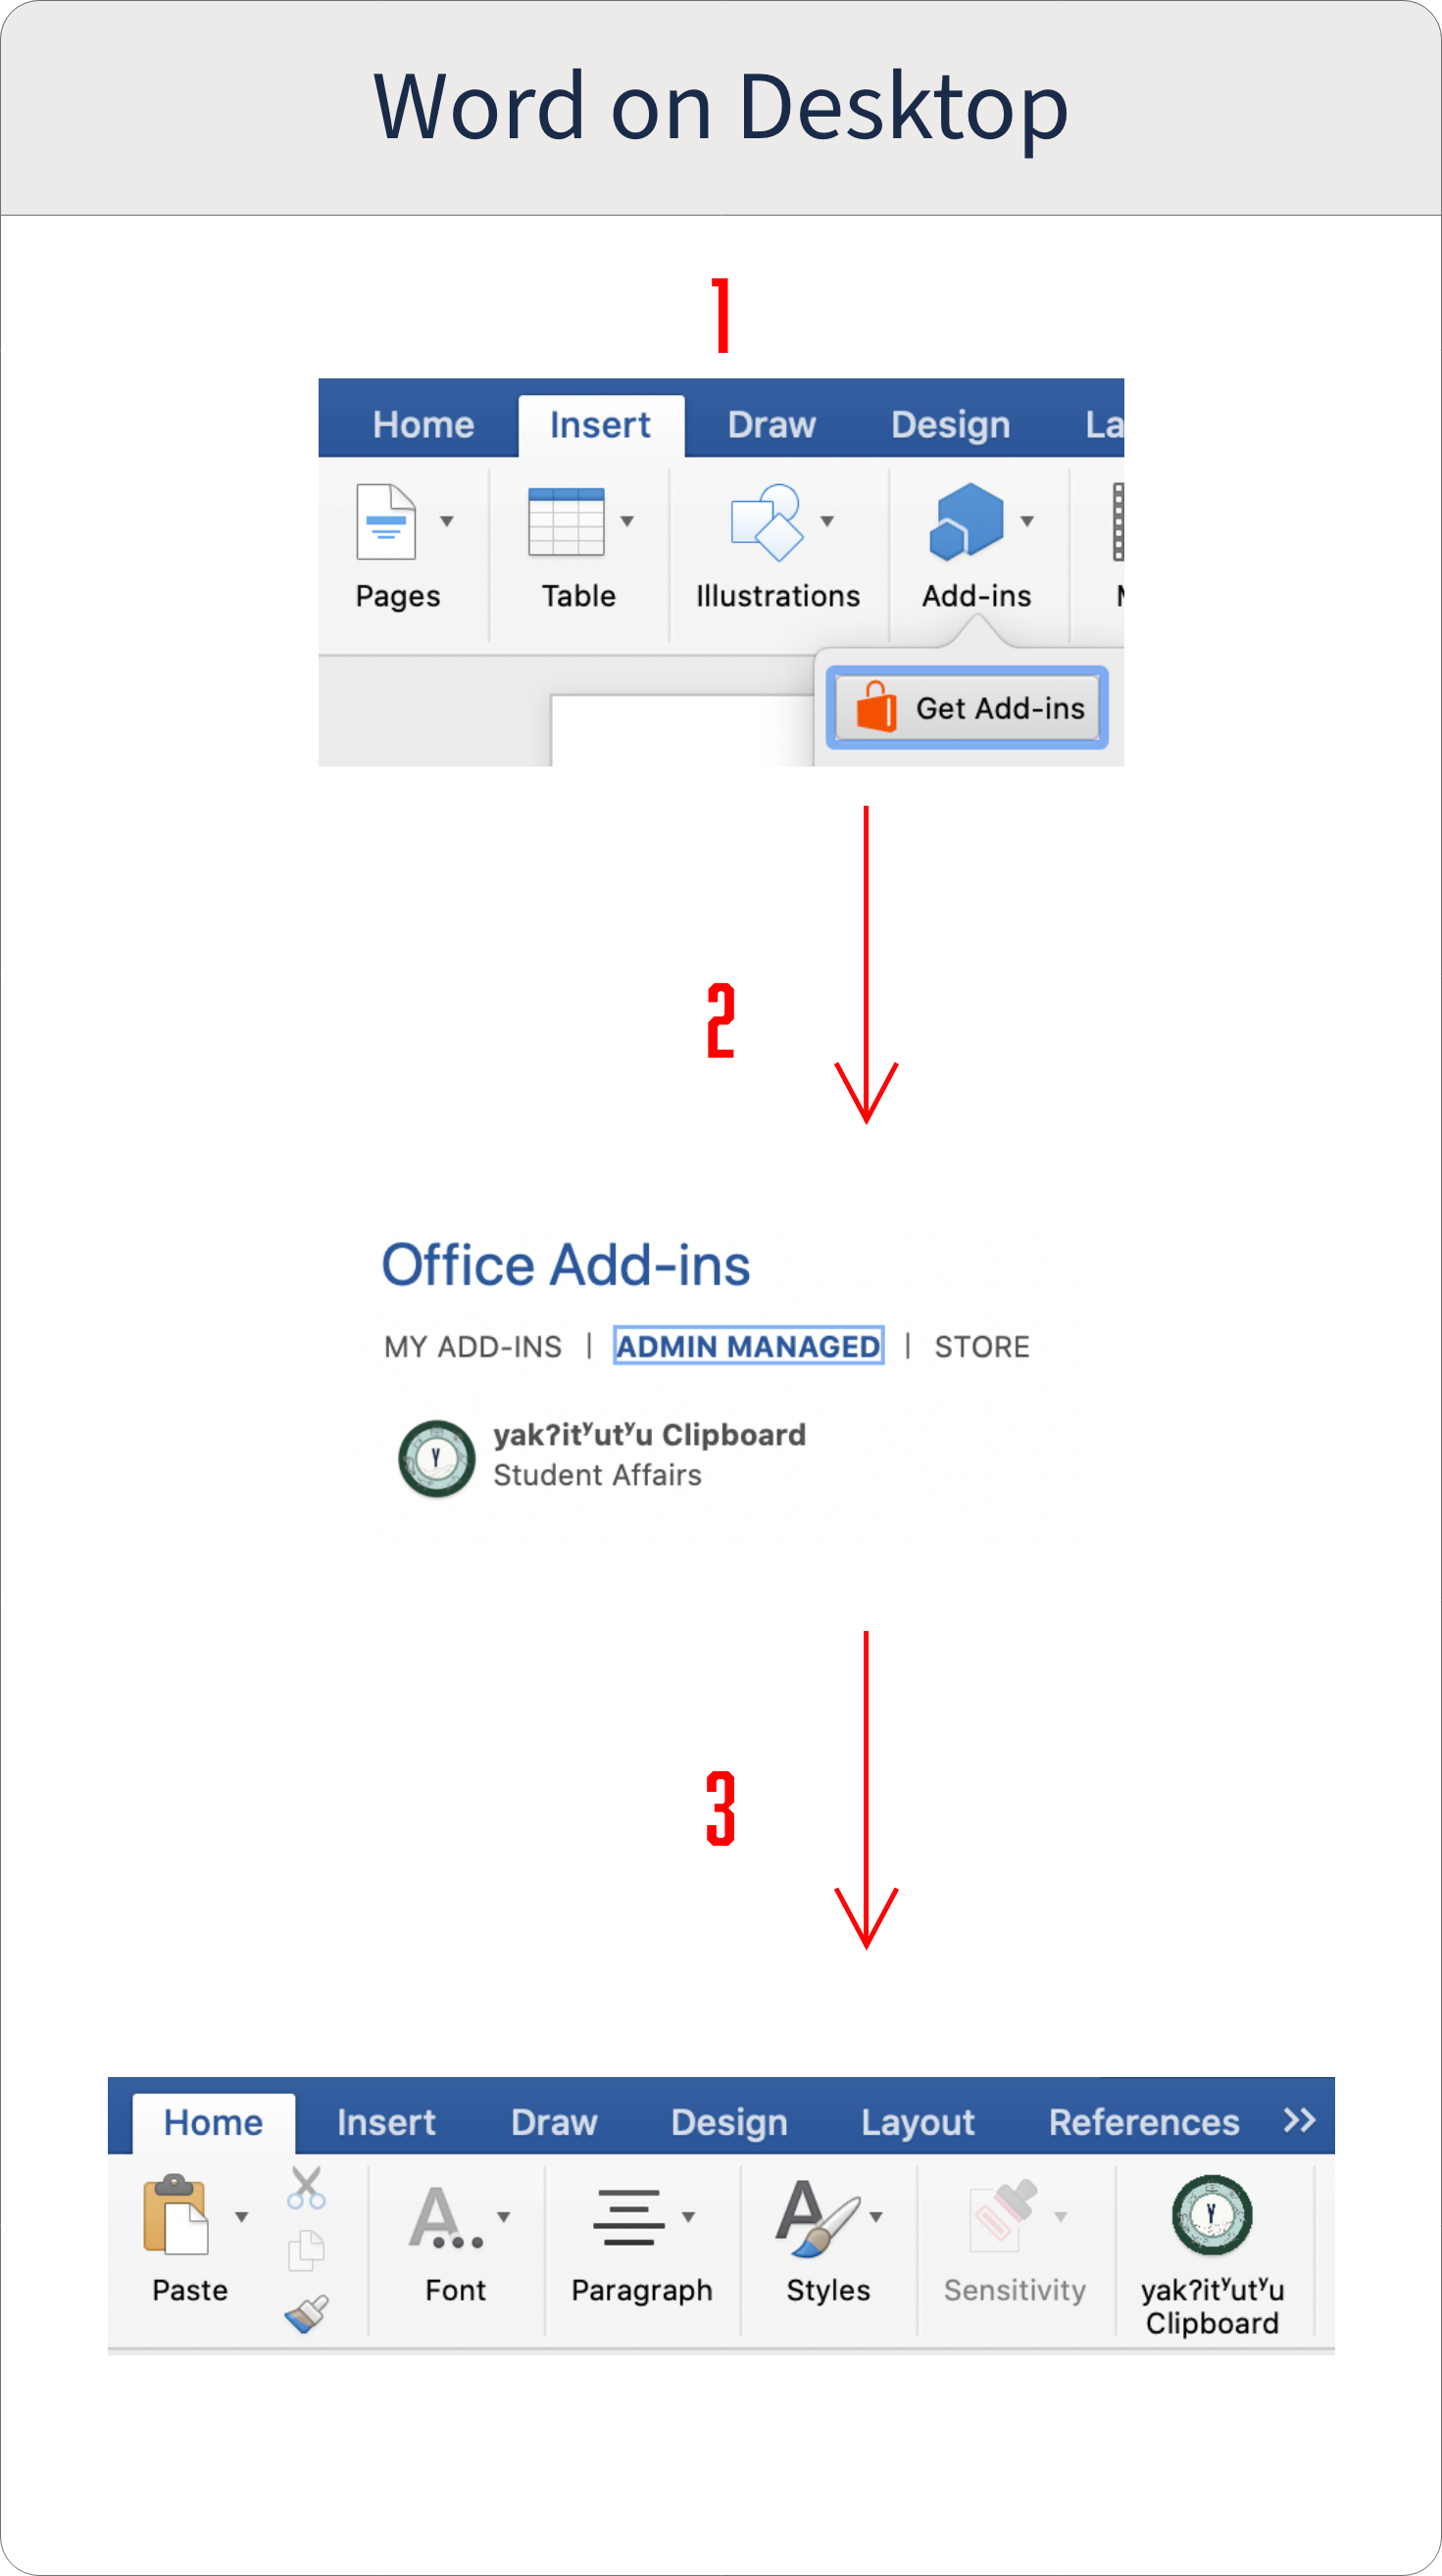
- Locate "Add-Ins" button.
-
On the utility toolbar, select the "Insert" tab.
-
Then select the three dot (...) option to expose the "Add-Ins" option.
- Activate the add-in.
-
Selecting the "Add-Ins" option, will display a new window with available add-ins.
-
Select the "Admin Managed" navigation option.
-
Add the "yakʔitʸutʸu clipboard" add-in
- Open and use add-in.
-
Return to the utility toolbar and select the "Home" tab.
-
The activated add-in should appear in this toolbar, under the three dot (...) menu option.
Back to Top
|
 |
- Locate "Get Add-Ins" button.
- Activate the add-in.
-
Selecting the "Get Add-In" option, will display a new window with available add-ins.
-
Select the "Admin Managed" navigation option.
-
Add the "yakʔitʸutʸu clipboard" add-in
- Open and use add-in.
Back to Top
*Compatible with Word Version 16.41 and higher
|
 |
